eBay: It's Photography That Sells
- by Peter Lerman (copyright 2010)
LIGHTS!
The worst, ugliest light you could possibly use for your eBay merchandise, no matter what you are selling, is the light that comes out of your on-camera flash. It is deadly horrible. You might as well just tell people you have an ugly piece of junk to sell and let them imagine what it looks like. Am I exaggerating? Only a little.
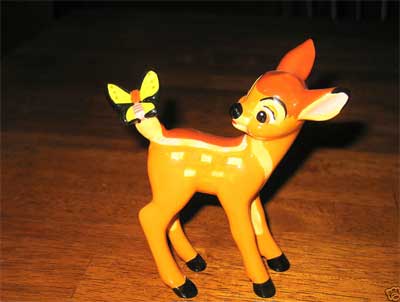 Here's one (top photo, actual eBay listing). The shadow is sharp and harsh and black. The light is so flat that there is no contour; no sense of the shape or feel. The colors are awful.
Would you pay $40 for something that looked like this (actual minimum bid for this item)? I would not. Simple lighting techniques that you can learn to master in a short time, and with little expense, can help you avoid presenting your fine collectibles looking like Happy Meal give-away toys.
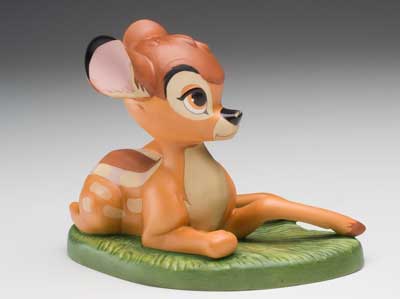 Take a look at a similar object but with better lighting (bottom photo). Better now? Thank you very much.
Learn to Light, and Like It!
First step: turn off the on-camera flash. You may have to look this up in the manual or ask someone you know to help you. For the fancier cameras, like the digital SLR's, you simply don't turn the flash on.
For the point-and-shoot cameras you are going to have to take the camera out of the "Full Auto" or "Program" mode. On my little Panasonic camera there is a button with a lightening bolt on the back of the camera and it lets me select "Force Flash OFF". Look for a similar selection in your camera's menus. Once the bad light is off we can start to create the good light. The camera will usually meter the light from whatever source and give you a good exposure. Use a tripod.
Let it shine!
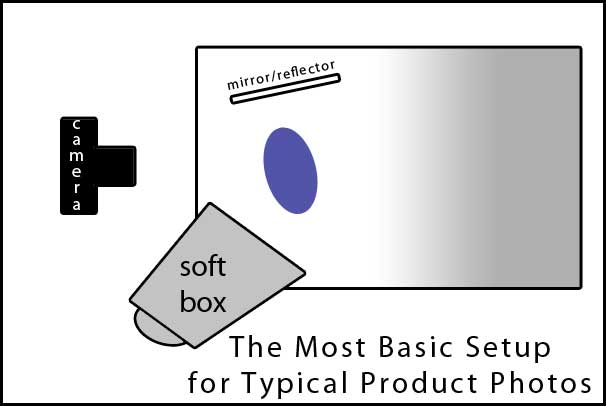
Let's start off with the most basic, easy to master and most effective lighting setup. It consists of ONE light source and ONE optional mirror or reflector. The object we are photographing is placed on the surface we set up in the first section. The camera is on a tripod in front of the object. The light is off to your right as you look through the camera, 1' to 2' above the surface, your object is in front of you and your reflector is off to your left.
BTW - Tripods are SO extremely helpful. Even a cheap one that you get on eBay for $10 will do the trick. It helps you compose carefully and holds the camera steady. You can create one basic camera and lighting setup for many, many items with the camera and the lights staying put. It also leaves your hands free to move your object and your lights while you look through the camera. There is NO still life photographer in the world who would work without one. Really, use a tripod.
or